I used adobe premiere pro to construct my clip, I considered using after effects for adding tints and an animated introduction however I found this was too complicated and I would have had to learn how to use it on top of what I was already having to get done. I didn’t see the use of after effects as an essential, it would have been a luxury to finish the film off.
All of my filming was done on my personal camera shown in figure 1, the reason for this was, I was ill on the Friday I went to collect my camera and tripod from school, I was filming on the Saturday and so wasn’t able to obtain a camera or tripod for filming. So I used my personal digital camera and a small tripod I found in the house. The tripod was only 10 inches long and so for head height shots I had to either use a raised surface or film by hand. This had an effect on the steadiness of my shots and it limited my positioning of camera angles. Despite this I feel that I produce and a very good range of clips to use in the editing process and selected those with as little shake as possible. After opening premiere pro for the first time, you have to create a new project. Within the project you are then presented with this screen, this is the sequence, the sequence will be what your files are edited on and forms a timeline for your clips. Selecting the ratio and quality of your sequence will depend on the format you filmed in whether it be widescreen or standard ratio. This will be important to ensuring the best quality video after
editing, exporting and then uploading. Once you have created your project you need to import your video clips. Select file from the main toolbar and go down to where it says import, you need to select this which will take you to the file select screen. This is the file select, here you can select the video files you want to use for your project. These files have to be saved in the same driver as your project, in my case these were all saved into my T drive. If you move these clips after you have imported them into your project then premiere pro will ask you to relocate them, so it is best to leave them in the same location once you have started. The imported file/s will show up in the far left sidebar. From here you are able to drag and drop them onto your sequence at the bottom centre of you screen. All files whether they be video, audio, images and titles will appear in this left hand box, all of them work on a drag and drop basis, but everything is edited on you sequence. Once your files have been dragged onto your sequence you can start editing. The sequence itself is built up from audio and video columns video in the top half and audio in the bottom half. All video files, images and titles should be placed in the video columns, and all soundtracks and sound effects should be placed in the audio columns. When you drag your clip onto the video column, the audio from that video will automatically appear directly below it in one of the audio columns. There are a couple of simple buttons at the side of each column these are basic actions such as muting audio and darkening a video. You are able to layer these clips in several columns, including placing text over you video, this is done by using several columns.
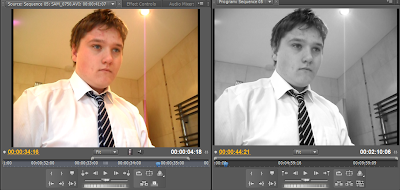
Editing my project I enjoyed the editing process of creating my project I found it really enjoyable and feel that I did a good job of it. In my storyboarding and planning I didn’t plan specific effects and transitions I decided on those through experimentation and watching over the film. I haven’t use this software before and so had to learn the basics from scratch, at home I watched YouTube tutorials on the basics of the software and when I came to college I put this into practise. But with all things you learn by practise and experimenting with the software. Effects In my film I didn’t use a lot of visual effects the area I concentrated on was lighting and colouring to create atmosphere. The biggest effect that I used was a black and white tint. This turned the entire video black and white, I hadn’t intended on doing this however felt that it was much more effective than standard colourisation. .
The lighting in my house was very yellowy, it made the video look to happy and not as sinister which is what I was going for. Some films pull the black and white effect very well, such as Sin City however in Sin City certain objects are colourised such as the lady in the red dress during the intro and the green in her eyes. I would have used this in my film however I was unsure how to do this and so settled for a simple black and white effect. This effect was called tint. The second effect that I used in my film was a Luma curve, I used this on the entrance of the killer this emphasises the shadows in the shot and gives it a darker more ominous feel. Combined with the low angle this creates a very menacing image.
 Transitions
 Most of the transitions in my film are straight cuts because with fading transitions it creates the feel of flow and softness. This was something that I wanted to avoid as I am creating a thriller. The use of transition was mainly used in the titles fading in and out and the odd cross dissolve to show time passing. The three transition effects that I used are additive dissolve, cross dissolve and fade to black, all of these were used in a specific way mainly to dissolve and image in dissolve it out or dissolve one image into the other.
Titles The title for the Production Company and studios was just a simple image inserted into the sequence with video transitions applied to it. I created these titles in fireworks, the SWA studios is a small animation company that myself and my friend used to run a YouTube channel for and now he uses it as the name for his multimedia production company, in graphics and web design as well as the sub YouTube channel I have setup which he supports all the graphics and media for. This meant that he already had a logo and them for the company and I just customised this theme to create a professional simplistic title. The RazzleTaz production company was just made up specifically for the video and I just created the title from the simple idea of making it black in colour and professional.
No comments:
Post a Comment